
Title: The Complete Step-by–Step Roof Installation Guide Every Homeowner Needs
Introduction
Every homeowner faces a day when their roof must be replaced. Roof installation is a major investment—but done well, it protects your home for decades. In this guide, we’ll walk you through the roof installation process, help you understand key decisions, and show how working with professionals like Trenton Roofing Experts makes it easier.
(For related tips on selecting roofing services, see our companion post “Roof Installation: What to Ask Before You Hire”.)
Why Roof Installation Matters
Roof installation is not just about aesthetics—it’s about:
- Structural safety
- Protection against leaks, wind, and weather
- Energy efficiency for the home
- Long-term durability
- Raising property value
A good installation sets the foundation for your home’s security. Poor workmanship, on the other hand, can lead to problems you’ll regret later.
Pre-Installation Planning
Before lifting a hammer, there’s careful planning to do. Skipping these steps often leads to delays, cost overruns, or rework.
1. Roof Inspection & Assessment
A professional should inspect:
- Roof deck condition (rot, warping)
- Roof pitch and complexity (valleys, hips, dormers)
- Underlayment requirements
- Ventilation, flashing, plumbing stacks
From that, you get a clear scope and estimate (you can read more about services at Trenton Roofing Experts’ Roof Installation page).
2. Material Selection
Your choice of roofing materials affects cost, performance, and aesthetics. Common options:
- Asphalt shingles
- Architectural / dimensional shingles
- Metal roofing
- Flat roofing (membrane or built-up)
Each has pros and cons in terms of durability, weight, and cost. The roof replacement or installation path often factors in what existing structure can bear.
3. Permits & Local Codes
Check local building codes. Some roofs need permits, inspections, or special wind/ice barrier requirements. Always do this before work begins.
4. Scheduling & Logistics
Coordinate material delivery, dumpster or waste disposal, and crew access. Adverse weather delays can push things out, so plan buffer days.
Roof Installation Process: What Happens on Site
Once everything is in place, the actual steps typically go as follows:
Step 1: Tear-Off (or Overlay)
If replacing an old roof, the team removes existing shingles, underlayment, flashing, and any rotted decking. Alternatively, some roofs allow overlaying a new layer if code permits.
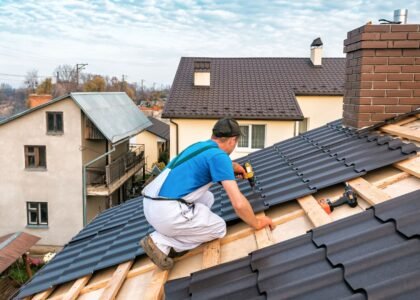
Step 2: Deck Preparation
Inspect and replace damaged sheathing, fasten loose boards, and ensure a flat, solid surface.
Step 3: Underlayment & Moisture Barrier
Lay underlayment (felt paper, synthetic) and ice/water barrier in critical areas (eaves, valleys). This is the waterproofing shield.
Step 4: Flashing & Vent Installations
Install or replace flashing around chimneys, vents, skylights, and roof edges. Proper flashing prevents leaks. Add roof vents if needed to improve ventilation.
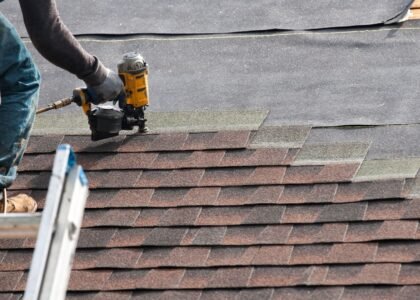
Step 5: Shingle (or Final Roofing Material) Installation
Start at the bottom (eave) and work upward, overlapping correctly. Install ridge cap shingles, hip caps, and sealant where needed.
Step 6: Final Inspection & Cleanup
Inspect all flashings, slopes, valleys, and ridge lines. Remove debris, nails, and waste. Make sure gutters, downspouts, and drainage are clear.
Common Challenges & Solutions
| Challenge | Possible Solution |
|---|---|
| Sudden weather changes (rain, wind) | Monitor forecast and install tarps or halt work when needed |
| Hidden rotted decking | Always inspect underneath and have spare sheathing ready |
| Flashing around odd shapes | Custom-cut flashing and flexible flashing tapes |
| Weak ventilation | Add ridge vents, soffits, or additional vents |
| Nail pops or leaks later | Use proper fasteners, overlap correctly, and perform quality inspection |
How to Choose a Reliable Installer
While this post is about installation, hiring the right roofing company is just as important as the process itself. Here’s what to look for:
- Experience with the specific roofing type you want
- Good references and portfolio
- Clear communication and scheduling
- Detailed contract and scope of work
- Proper cleanup and final inspection
(To get started with a trusted installer, you can check out Trenton Roofing Experts’ Roof Installation service page and then reach out via their contact form.)
After Installation: Maintenance Tips
Even after a new roof is installed, regular maintenance ensures it lasts. Consider:
- Annual inspections (twice a year)
- Clearing debris, leaves, moss
- Checking flashing and sealant
- Repairing minor damage quickly
Over time, wear may appear—but proactive care helps you avoid a full replacement unexpectedly.
Conclusion
Roof installation is a major project, but broken down into stages, it’s manageable. Planning, choosing good materials, and hiring skilled professionals make all the difference.
If you’re ready to explore your options for new roof installation, start with the Roof Installation page at Trenton Roofing Experts, then use their contact form at #contact us to initiate your project.
And if you want to learn what questions to ask before hiring a roofing company, don’t miss our next blog: Roof Installation: What to Ask Before You Hire.